What is Scale Pose Yoga
- Its Sanskrit name is Tolasana wherein Tola means ‘scale’ and asana indicates ‘yoga postures’.
- After lifting the body off the floor, it swings back and forth like a scale.
- It is pronounced as ‘toh-LAHS-uh-nuh’.
- Helps to strengthen arms, wrists and abs.
- It targets wrists, arms, shoulders and core.
- It is an Intermediate level pose. It is also practised as part of power and vinyasa yoga.
- It is a balancing yoga.
Different names
- Scale pose yoga
- Tolasana
- Lifted lotus
- Elevated Lotus Pose
- Utthita Padmasana
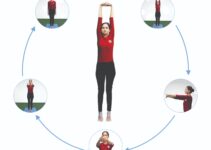
How to do Scale pose-Step by step technique
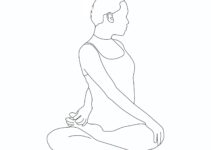
- First, sit in Padmasana.
- Place the palms on the surface and try to make it firm there.
- Exhale, and lift your legs and buttock (Padmasana) away from the surface.
- Maintain the pose for a few seconds without movement of the body.
- Increase the holding duration gradually.
Contraindications
The pose should be avoided in the following conditions.
- Increase the holding duration gradually.
- Shoulder and wrist injuries.
- Ankle injury
- Knee injury
- Hips or thigh issue
- Arms issue
- Elbow problems
- Hernia
- Menstruation
- Pregnancy
Props
- The pose can be performed with the help of props.
- One can use blocks below one’s palm to raise the body.
Preparatory poses
- Dandasana
- Vajrasana
- Padmasana
- Baddha Konasana
Follow up poses
- Dandasana
- Janu Sirsasana
- Kukkutasana
Counter poses
- Stickasana
- Vakrasana
- Dog-facing pose
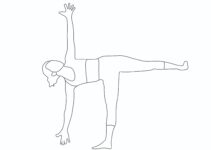
- Triangle pose
- Warrior Pose
Scale pose yoga benefits.
- It is a beneficial yoga pose for health and wellbeing.
- The pose helps to strengthen arms, wrists and abs.
- The practice of it develops strength. It strengthens the abdominal muscles and re-energies the abdominal organs, facilitating digestion.
- It is one of the best yoga poses that gives perfect balance and encourages concentration.
- The muscles, viz. biceps, triceps, and the brachioradialis, are stimulated during the practice.
- It stimulates the abdominal muscles in such a way as to improve digestion.
Modifications and Variations
- To perform Tolasana and extract its maximum benefits, practising Padmasana is necessary. But, many people experience difficulty in the pose.
- One can use a block to himself off the floor.
- If somebody has a problem in the lotus pose, better to practice with an easy pose (Sukhasana).
- With an easy pose, draw your knees towards your chest.
- It can also be practised with Ardha Padmasana.
Precautions
- Attention should be given to the pelvic bone.
- Alignment of the shoulders and wrists should be of the utmost importance.
- Breathing should be slow and deep.
- Warm-up exercises are required before practising tolasana.
- Always works under your limit.
Tips
- Focus should be given to alignment, mechanism, and movement of the pose.
- Since Lotus Pose is the first step of practising this yoga posture, it is better to get mastery first over padmasana.
- The beginner should lift their sit bones off the floor, keeping their legs on the ground.
- Breathing should be deep and slow while practicing the pose.
- Initially, it should start with a few seconds; gradually, the holding duration should be increased.
- If you are an advanced practitioner, do this yoga pose along with uddiyana bandha and mula bandha.
Beginner’s tip
- Initially, practising this yoga pose for the first timer is a little bit difficult.
- Instead of padmasana, they should start with ardha padmasana or sukhasana.
- First, lift off your sit bones, keeping your legs on the floor.
- And gradually, move towards the perfection.
Breathing
- While in the lotus pose, do normal breathing.
- Exhale, lift off your body.
- Do slow inhaling and exhaling while maintaining the pose and focusing on the coordination between your mind and body.
- Inhale, bring your body down.