Sun Salutation meaning
Sun Salutation is also known as Surya Namaskara. The Sanskrit name Surya refers to the Sun, and Namaskara means ‘salutation’. Surya Namaskara has been handed down from the enlightened sages of the Vedic Age. In Yoga, the sun is represented by Pingala or Surya Nadi, the Pranic channel carrying the vital, life-giving force. Sun Salutation directly vitalises the solar energy of the body, which flows through Pingala Nadi. Regular practice of Sun Salutation regulates Pingala Nadi, whether under-active or over-active, which leads to a balanced energy system at mental and physical levels1. Sun Salutation is an effective way of loosening up, stretching, massaging, and toning all the body’s joints, muscles, and internal organs.
How to do Sun Salutation step by step
Step1: Pranamasana (Prayer Pose)
Stand with the feet together or slightly apart and the arms hanging loosely by the side of the body. Close the eyes gently and become aware of the whole physical body as one homogeneous unit. Try to minimise oscillation and balance the body, having weight equally on both feet. Slowly bend the elbows and place the palms together in front of the chest in Namaskara Mudra, mentally offering homage to the sun, the source of all life. The awareness may be kept on the chest area.
Step 2: Hasta Utthanasana (Raised Arms Pose)
Raise and stretch both arms above the head. Keep the arms separated, shoulder-width apart. Bend the head, arms, and upper trunk backwards per your flexibility. The awareness may be kept on the abdomen’s stretch and the lungs’ expansion.
Step 3: Padahastasana (Hand to Foot Pose)
Bend forward until the fingers or palms of the hands touch the floor on either side of the feet. Try to touch the knees with the forehead. Please don’t worry. Could you keep the knees straight? The awareness may be maintained in the pelvic region.
Step 4: Ashwa Sanchalanasana (Equestrian Pose)
Place the palms of the hands flat on the floor beside the feet. Stretch the right leg back as far as possible. At the same time, bend the left knee, keeping the left foot on the floor in the same position. Keep the arms straight. In the final part, the weight of the body should be supported by the hands, the left foot, the right knee, and the toes of the right foot. The head should be tilted backwards. The awareness may be kept on the stretch from the thigh to the chest or the eyebrow centre.
Step 5: Parvatasana (Mountains Pose)
Could you take the left foot back beside the right foot? Simultaneously, raise the buttocks and lower the head between the arms so that the back and legs form two sides of a triangle. The legs and arms should be straight in the final position. Keep the heels on the floor in the final pose and bring the head towards the knees as far as possible. Please don’t worry. The awareness may be kept on relaxing the hips or throat region.
Step 6: Ashtanga Namaskara (Salute with eight parts or points)
Lower the knees, chest, and chin to the floor. In the final position, only the toes, knees, chest, hands, and chin touch the base. The knees, chest, and chin should brush the floor simultaneously. If this is not possible, lower the knees, the chest, and finally, the chin. The buttocks, hips, and abdomen should be raised. The awareness may be kept on the abdominal region.
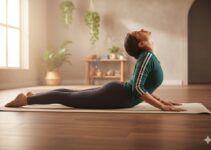
Step 7: Bhujangasana (Cobra Pose)
Lower the buttocks and hips to the floor, straightening the elbows, arch the back and push the chest forward into the cobra pose. Bend the head back and direct the gaze upward to the eyebrow centre. The thighs and hips remain on the floor, and the arms support the trunk. Unless the spine is very flexible, the components will remain slightly bent. The awareness may be kept on the relaxation of the spine.
Step 8: Parvatasana (Mountains Pose)
This stage is a repeat of position 5. From Bhujangasana assume Parvatasana. The hands and feet do not move from position 7. Raise the buttocks and lower the heels to the floor. The awareness may be kept on relaxing the hips or throat region.
Step 9: Ashwa Sanchalanasana (Equestrian Pose)
This stage is the same as position 4. Keep the palms flat on the floor. Bend the left leg and bring the left foot forward between the hands. Simultaneously, lower the right knee so that it touches the floor and push the pelvis forward. Tilt the head backwards, arch the back and gaze at the eyebrow centre. The awareness may be kept on the stretch from the thigh to the chest or the eyebrow centre.
Step 10: Padahastasana (Hand to Foot Pose)
This position is a repeat of position 3. Bring the right foot forward next to the left foot. Straighten both knees. Bring the forehead as close to the knees as possible without straining. The awareness may be kept on the pelvic region.
Step 11: Hasta Utthanasana (Raised Arms Pose)
This stage is a repeat of position 2. Raise the torso and stretch the arms above the head. Keep the arms separated, shoulder-width apart. Bend the head, arms, and upper trunk backwards. The awareness may be kept on the abdomen’s stretch and the lungs’ expansion.
Step 12: Pranamasana (Prayer Pose)
This is the final position and is the same as position 1. Bring the palms together in front of the chest. The awareness may be kept in the region of the heart.
Easy ways to practice Sun Salutation
The twelve positions of Surya Namaskara are practised twice to complete one round. Positions 1 to 12 constitute half around. In the second half, the positions are repeated with two minor changes: a) In position 16, pull the left foot back instead of stretching the right foot backwards. b) In position 21, bend the right leg and bring the right foot between the hands. The ideal time to practice Surya Namaskara is sunrise, the most peaceful day. Whenever possible, practice in the open air, facing the rising sun. Sunset is also an excellent time to practice as it stimulates the digestive fire. Surya Namaskara, however, may be practised at any time, provided the stomach is empty. Surya Namaskara is ideally practised before other Asanas. After completing Surya Namaskara, practice Shavasana for a few minutes. This will allow the heartbeat and respiration to return to normal and all the muscles to relax.
Sun Salutation precautions
For people suffering from high blood pressure, coronary artery disease, stroke, hernia, intestinal tuberculosis, and during the onset of menstruation, Surya Namaskara should not be practised.
Best benefits of sun salutation
Surya Namaskara is a complete Sadhana spiritual practice, which includes Asana, Pranayama, Mantra, and meditation techniques. It stimulates all body systems, including the reproductive, circulatory, respiratory, and digestive systems. Its influence on the endocrine glands helps to balance the transition period between childhood and adolescence in growing children.1, 2 Surya Namaskara makes the practitioner physically fit, mentally alert, and emotionally balanced. To conclude, Surya Namaskara is the ideal practice to increase awareness and bestow good health and well-being1, 2
References
- Swami Satyananada Sarswati. Asana Pranayama Mudra Bandha. Yoga Publication Trust, Munger Bihar, India. Page 159- 172.
- Swami Satyananda Saraswati. Surya Namaskara: A Technique of Solar Revitalization. Yoga Publication Trust, Munger Bihar, India.